
#
Create a Virtual Machine in Azure

This tutorial explains how we can create a Virtual Machine in Azure.
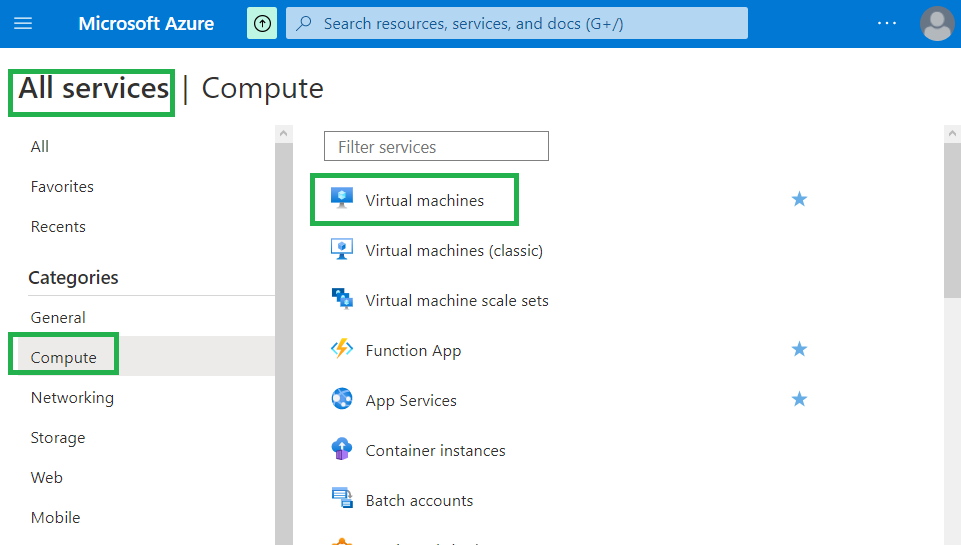
From the Azure Console, from "All services" -> "Compute", click on "Virtual Machines"
The following screen will appear:
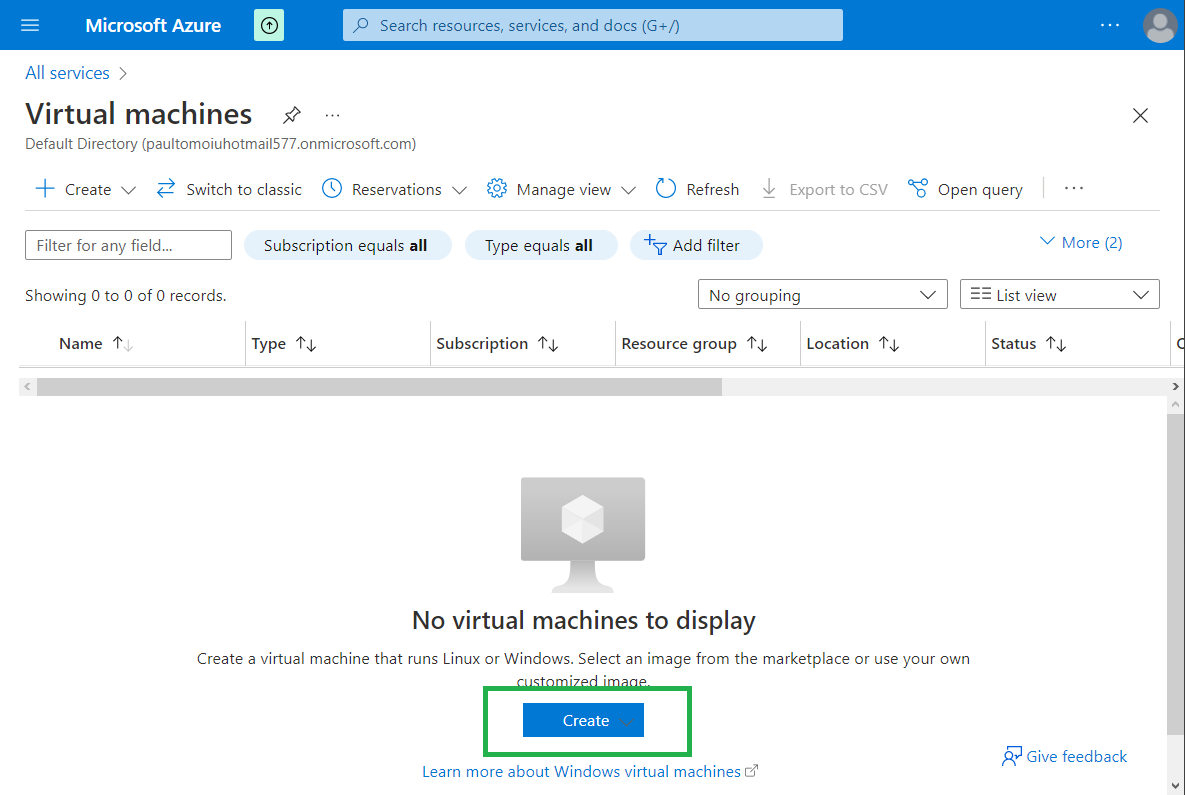
Click on "Create" button in order to create a new VM.
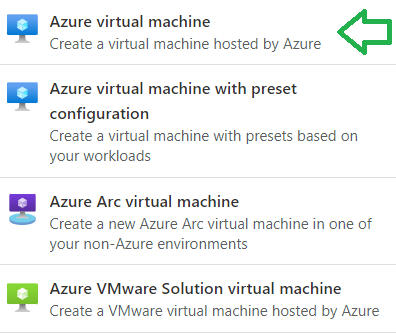
Choose the type of the VM you want to create.
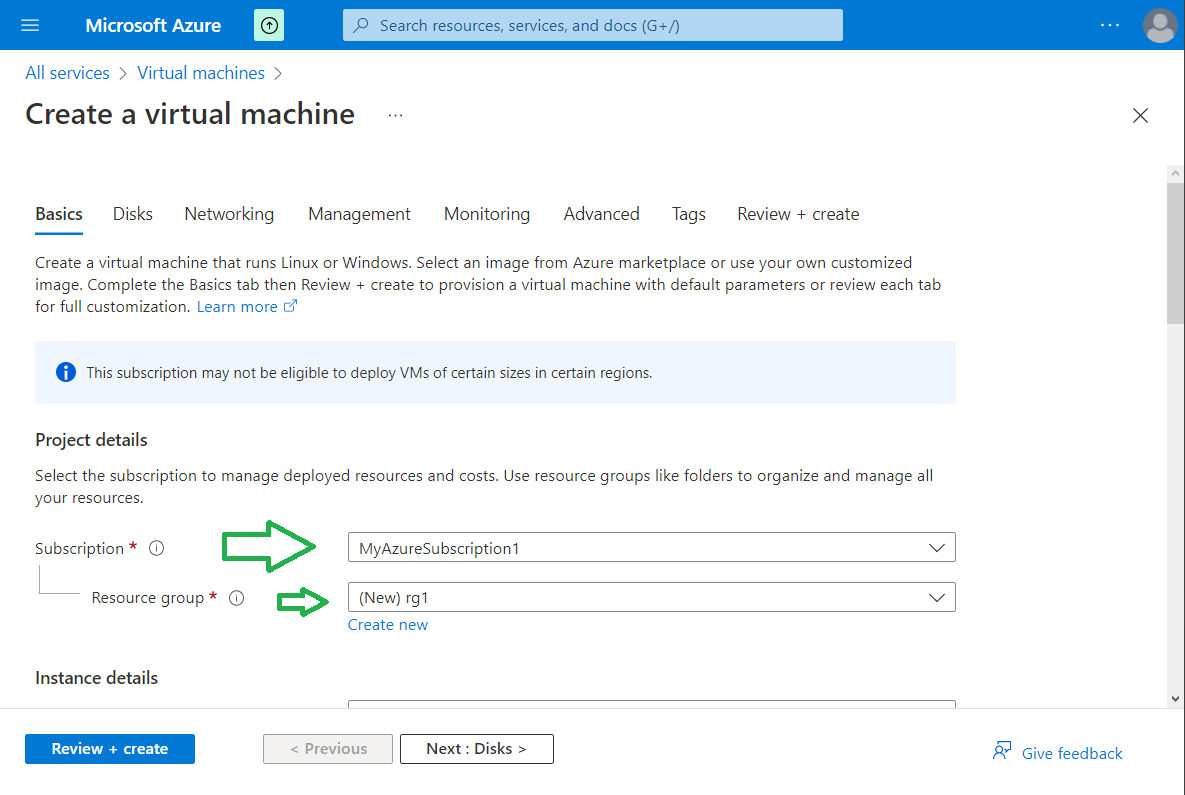
Choose the Subscription and the Resource Group you want to use.
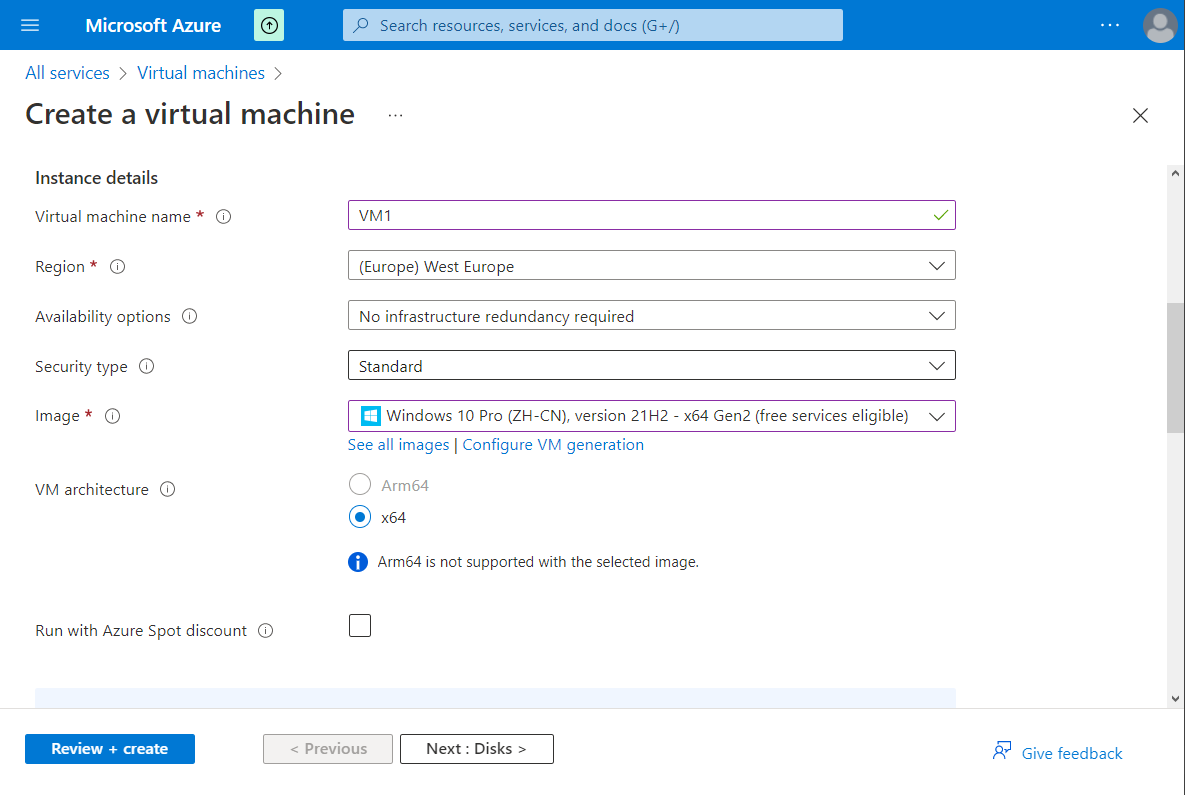
Choose the Instance details you want.
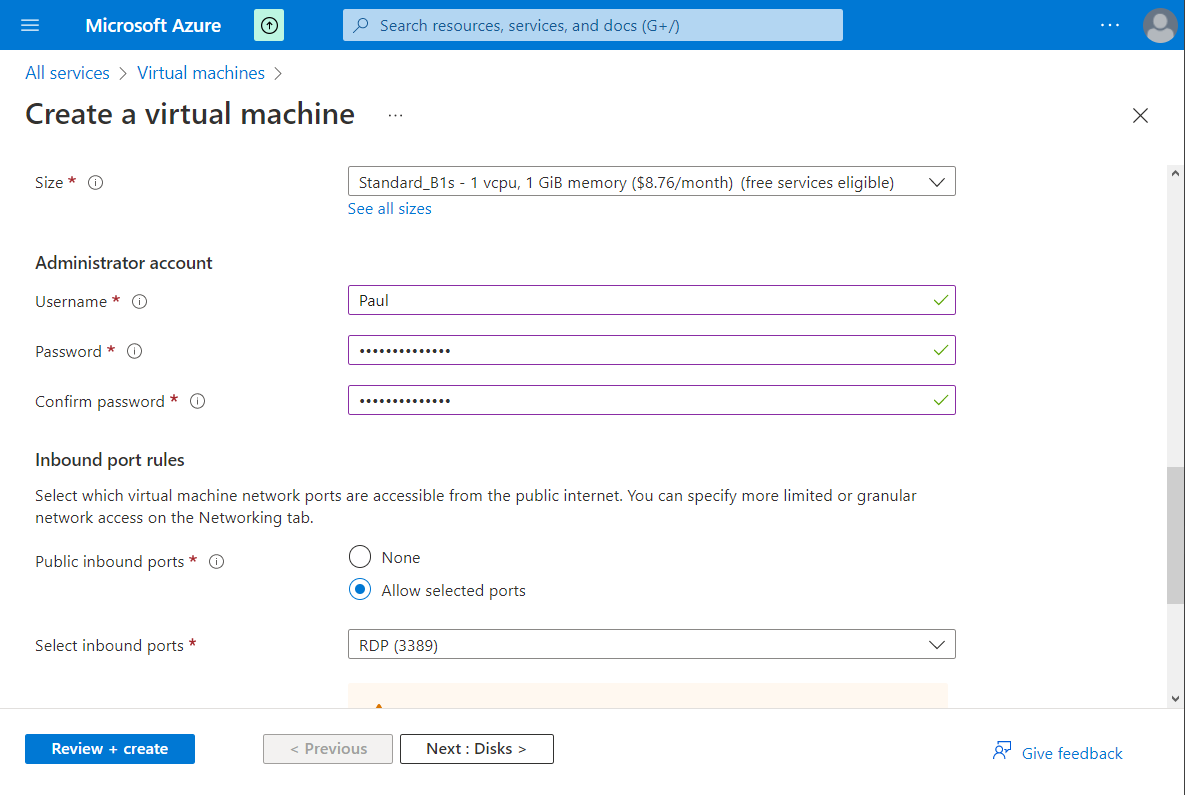
Choose the Size of the VM, Administrator username and password, and the Inbound port rules
Click on "Next: Disks".
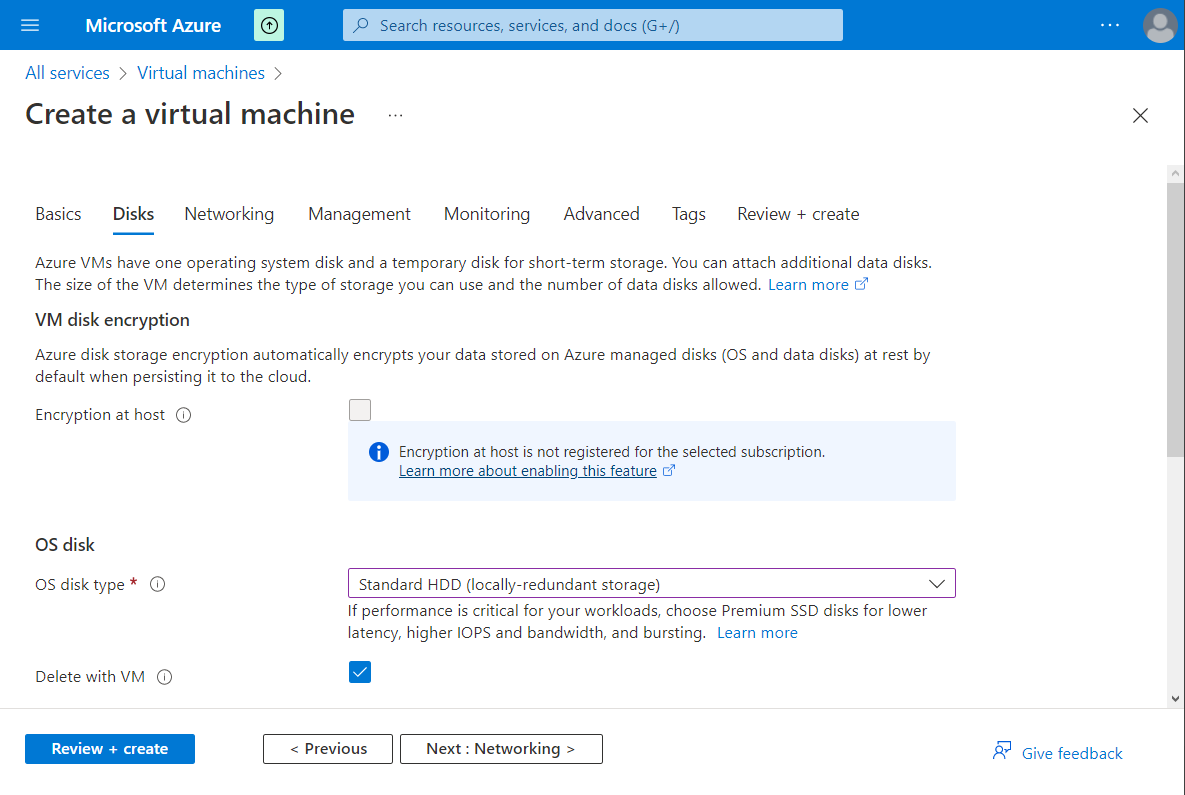
Choose VM disk encryption, OS disk type, persistent disk behaviour when a VM is deleted.
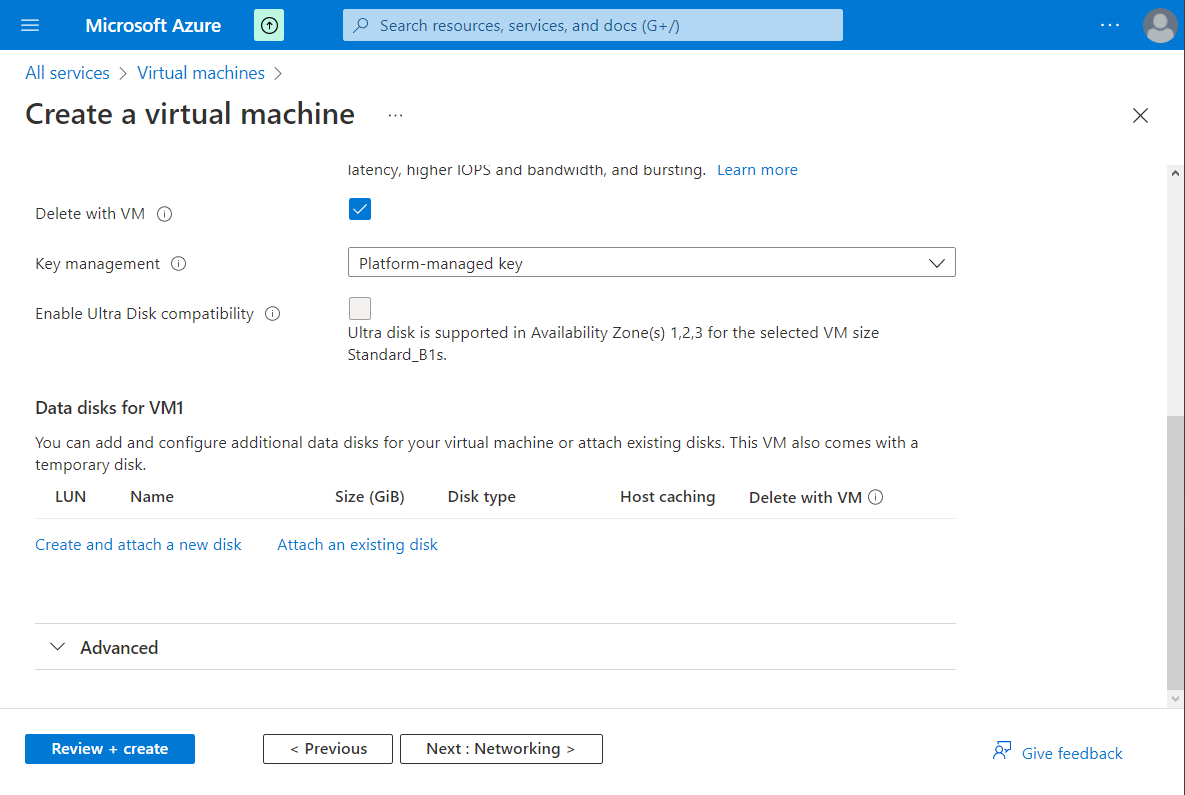
Select the Key management, and attach new disk to the VM if you want. Click on "Next: Networking".
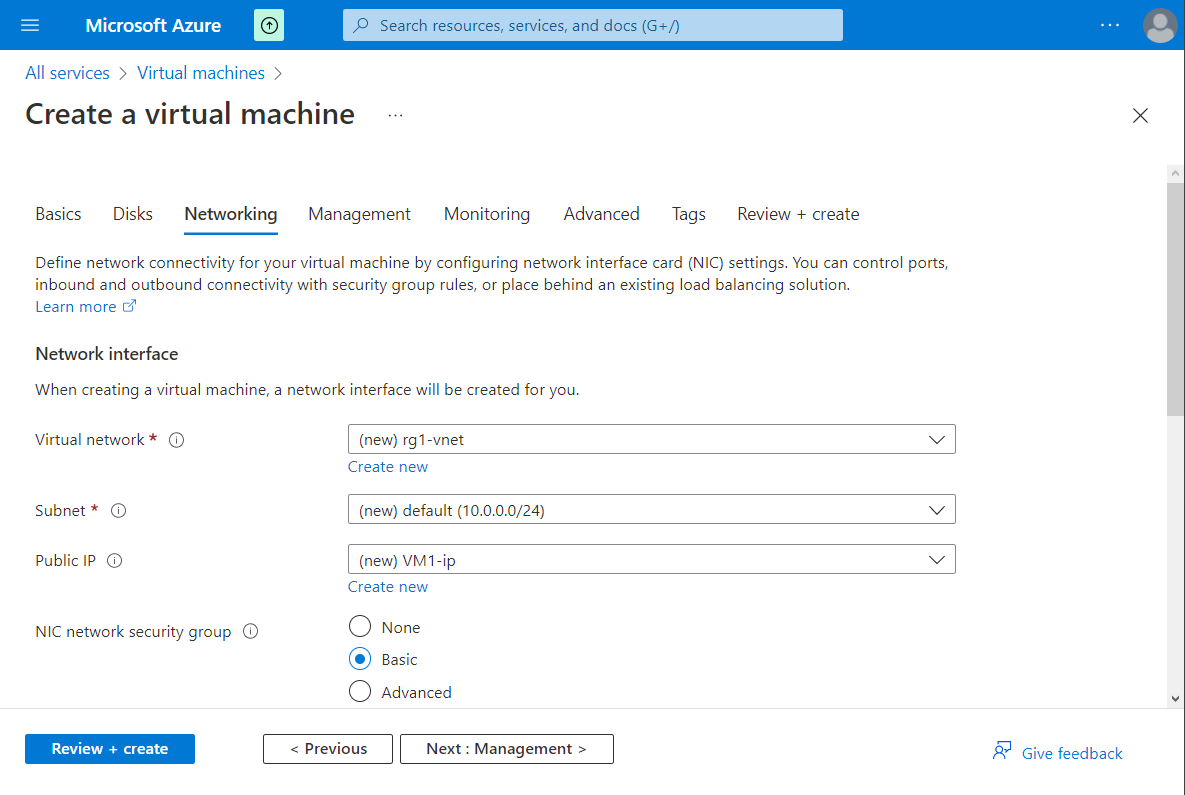
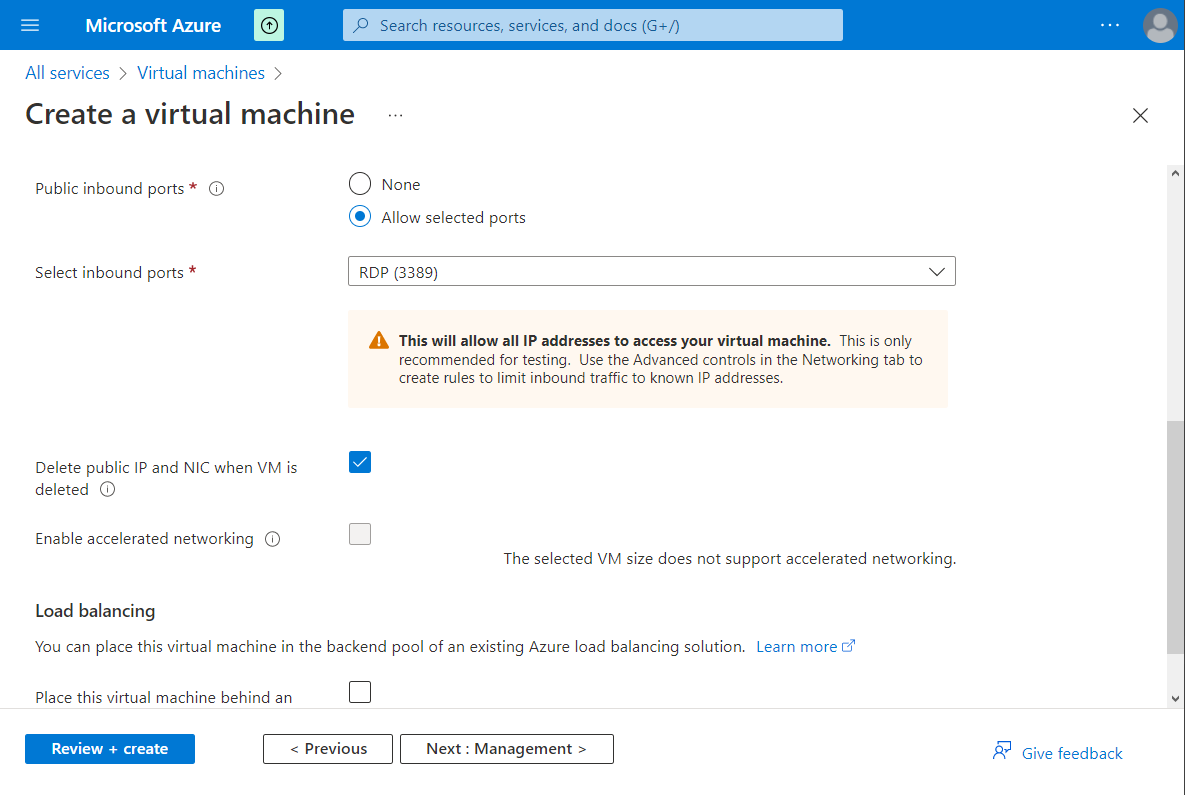
Define Public inbound ports. Check "Delete public IP and NIC when VM is deleted" if you want. You can place this virtual machine behind an existing load balancing solution. Click on "Next: Management".
From this page you can :
- Enable system assigned managed identity
- Login with Azure AD
- Enable auto-shutdown
- Enable hotpatch
From "Monitoring" page you can :
- Enable recommended alert rules
- Enable OS guest diagnostics
You can click on "Review + create" button in order to create the VM.
You can see all VM characteristics. Click on "Create" button.
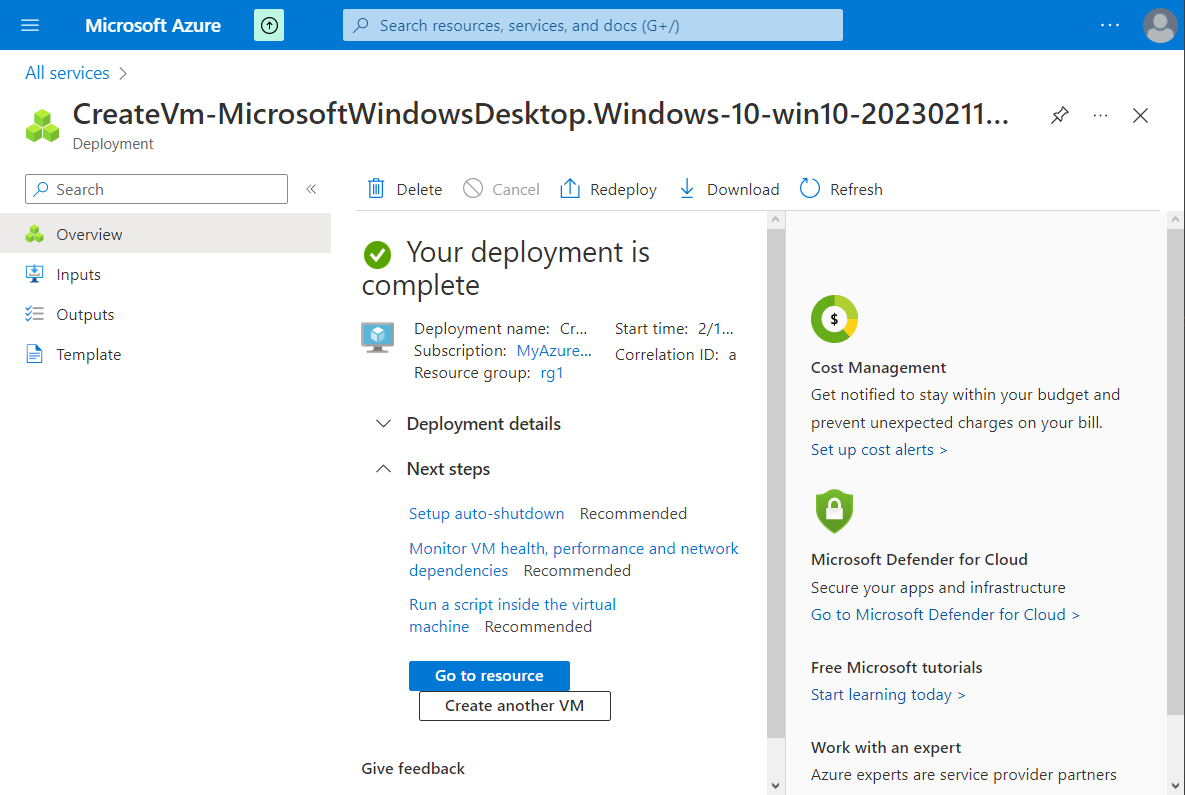
At this point the VM is created.